
*This post may contain affiliate links for which I earn commissions.*
Time and use can make a purse look shabby. Fortunately, there are six easy things you can do to make your Loungefly bags look new again!
The only mishap that I have experienced was a crack in the material on one bag, which isn’t something that will be addressed in this article, so I’ve been lucky. But it’s good to know that more common issues, such as pen ink, scuffs, and dirt, can be fixed with minimal effort.
The steps discussed here are also very helpful if you buy used purses or mini backpacks that arrive in less-than-perfect condition. Following these instructions should help bring them back to life, so to speak.
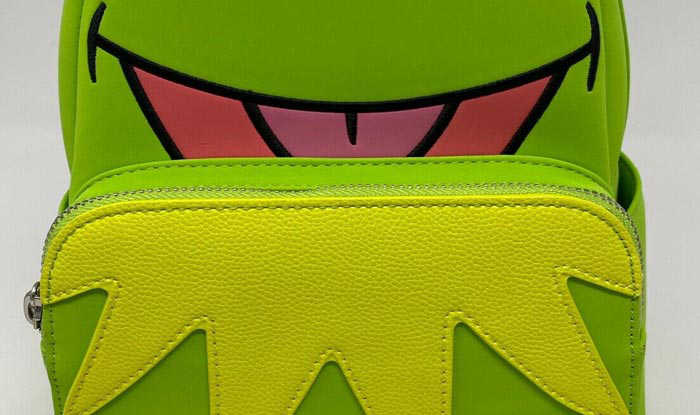
The instructions found here are for bags made from faux leather, not faux suede, velvet, or fabric. The image below is an example of the kinds of textures that you can use these instructions on, as this image shows both grainy and soft materials.
FYI, the video was created by a lovely young woman who has a British accent. At one point she says to use a “lacky band” to fix ears that have fallen forward (although I initially heard her say “lucky”, not lacky). I had no idea what a lacky band is so I asked a friend of mine who lives in the UK. Turns out that it is slang for an elastic band, or what we in the US call a rubber band.
Supplies Needed
Baby oil
Rubber bands
Packing paper
Twist tie (or cardboard and tape)
Step by Step Instructions
Important! Before you do any of the steps that use a cleaning product, I encourage you to do a test area such as on the bottom to make sure whatever product you use doesn’t cause damage to the color or patterns on the surface of the purse.
1. To Remove Ink Stains – If you keep a pen in your purse then at some point you might accidentally mark the exterior with it. If this happens then you can remove it by using The Pink Stuff paste. You do so by applying a small amount to the stain with a soft, damp cloth and gently rubbing it in. If the ink’s color starts to come off on the rag then find a clean part of the cloth and continue.
When you are done then you will need to rinse the past off the surface of your bag with clean water. Then use a dry, clean cloth to polish the bag.
2. To Remove Scuffs And Dirt – Scuffs and dirt are probably the most common mishaps to happen to purses but they are also usually the easiest to clean. Some people recommend using baby wipes but you may find that makeup removal wipes are a better choice. The texture and ingredients make them more effective for cleaning bags.
All you need to do is get a wipe (make sure that it is alcohol free to prevent accidentally removing the pattern or color on your bag) and gently wipe at the scuff or dirt. Use another wipe, if needed.
3. To Make Your Bag Shine Again – Over time bags can look dull but all you need to do to restore their original shine is use a very small amount of baby oil. The emphasis is on “small” because too much will make a mess. Use a cotton ball with a dap of oil, then rub the cotton ball over the surface of the bag.
4. To Make Ears Stand Up Straight – This step is for those of you who have mini backpacks of Mickey or Minnie Mouse and there are ears that stick out from above the bag. Over time the ears can start to fall forward and no longer stick up straight.
All you need to do to fix this is get two rubber bands. Take the first band and put it around one ear and the bag’s handle. Repeat this with the other ear and the handle. Wait about 12 hours, then remove the bands and the ears should be sticking up again. Easy peasy.
5. To Fix Misshapen Bags – Let’s face it, bags get smooshed over time or when shipped. To restore the original shape you will need paper. Packing paper, like the kind you get in Amazon and Chewy boxes, is easiest to use because you will need enough to completely fill the bag.
Simply fill the bag with paper. Be sure to overfill it, just to be sure that they plump back out, but not so much that you can’t zip it closed. Leave the paper inside for a couple of days and then remove it.
6. To Hide Straps – The straps for mini backpacks hang down when not in use. If you want to protect the straps from getting dirty or damaged when you have the bag stored, or when you have it on display, then you will need to fold the straps up and keep them like that.
The woman in the video suggests using cardboard and tape, which you can definitely do. I think an easier way is to use a twist tie. Twist ties are available on bags of bread and can be reused as often as you need.
To hide the straps you will fold them up behind the back of the bag, then secure each strap with a twist tie (or cardboard and tape). When done you will be able to hang it, set it somewhere to display, or put it away without fear that the straps will be in the way or get dirty.
Every one of these steps is simple to complete, though some are easier than others such as #6. The most difficult is #1 with the cleaning paste, but it’s easy enough that practically anyone can do it and none of these instructions require any special skill.
Have you completed any of these steps? If so, which one? How did it go? Are you happy with the results? Let me know in the comments below.